Echo Water Softener | Installation and Operation Manual
Powered by Crusader
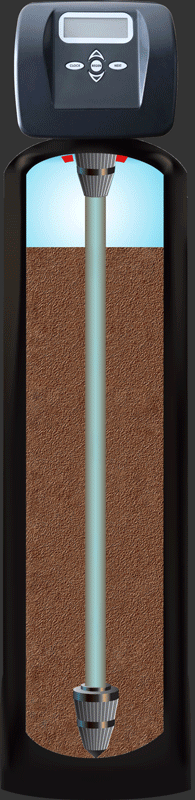
What's Included
- (1) Water Softener
- (1) Control Valve and Computer
- (1) Brine Tank
- (1) ProGaurd Feeder
- (1) Bottle of ProGuard Solution
- Connections
What Media is Inside: The exchange media is a high quality, FDA certified, commercial-grade strong acid (Cation) Functional Matrix resin with a very high whole bead count and no color throw. It is physically hard and is moderately chlorine resistant. The media combines high operating capacity with excellent chemical and physical stability for a long, dependable life.
Water Softener System – Product Specifications
| Specification | Details |
|---|---|
| Flow Rate | 14 gallons per minute (gpm) |
| System Type | Water Softener |
| Pressure Vessel Dimensions | 54” (H) x 13” (Diameter) |
| Overall System Height | 62” |
| Required Installation Space | 14” (D) x 25” (W) x 62” (H) |
| System Weight | 115 lbs |
| Brine Tank Dimensions | 14” (L) x 14” (W) x 34” (H) |
| Media Replacement | ~ every 5 years |
| Maximum System Capacity | 50,000 grains |
| Max Salt Usage per Cleaning Cycle | 22 lbs |
Warnings & System Operational Requirements
The Echo Water Filtration systems utilizes advanced salt-based ion exchange technology to deliver water that is soft, pure, and free of inorganic minerals. To ensure optimal performance and maintain warranty compliance, the system must be installed on microbiologically safe water and meet the following installation requirements:
Installation Requirements
| Parameter | Minimum | Maximum |
|---|---|---|
| Water Temperature | 30°F | 75°F |
| Water Pressure | 30 psi | 75 psi |
| Influent Water Hardness | 0 gpg | 100 gpg* |
| Influent pH | 6.7 | 8.7 |
| Influent TDS (Total Dissolved Solids) | 10 ppm | 1000 ppm* |
| Pathogenic Bacteria | N/A | 0 CFU |
| Chlorine | 0 ppm | 3 ppm |
| Chloramine | 0 ppm | 1 ppm |
| Ambient Temperature | 40°F | 120°F |
Note: Water hardness levels above 22 gpg and TDS above 500 ppm may negatively impact water taste.
For best results, ensure that your system is installed according to these specifications. If you have concerns about your water quality or need assistance with installation, consult your local Echo Water Filtration professional.
General Warnings
System Installation & Alignment
The control valve fittings and bypass assembly are designed to accommodate minor plumbing misalignments but should not bear the weight of the system or plumbing.
Chemical Exposure Warning
Avoid exposing the system to hydrocarbons such as kerosene, benzene, gasoline, or similar substances, as they may damage plastic components and O-rings, leading to leaks.
Do not install this system on water supplies containing hydrocarbons.
Monitoring & Lubrication
This water meter should not be relied upon as the primary monitoring device for critical or health-related applications.
Do not use petroleum-based lubricants (e.g., Vaseline, oils) or spray silicone on any system components.
If lubrication is necessary, only use silicone lubricant on black O-rings—but in most cases, this is unnecessary.
Handling Nuts, Caps, and Fittings
The nuts and caps should be hand-tightened or adjusted with the provided plastic wrench only.
If necessary, pliers may be used to loosen a nut or cap, but do not use a pipe wrench to tighten or loosen these components.
Do not insert a screwdriver into cap slots or use a hammer for adjustments.
Thread Sealing & Connections
Do not use pipe dope or other sealants on threaded connections.
Use Teflon tape only on the threaded inlet, outlet, and drain fittings—it is not required on nut connections or caps, as they rely on O-ring seals for a secure fit.
Valve Maintenance & System Reset
If performing maintenance on the drive assembly or piston components, unplug the power source jack from the printed circuit board (black wire).
Once maintenance is complete, plug the power source back in and press and hold the NEXT and REGEN buttons for 5 seconds to reset the system.
The display should flash system details, show the software version, and then return to service mode.
Plumbing Requirements
-
All plumbing must comply with local plumbing codes.
- Comes with 6 feet of tubing. Sufficient to put right next to system
- Max Drain Run: 100 ft.
- i.e Can put Filter System downstairs, Brine Tank upstairs for convenience.
- Basement Install: Connect to floor drain.
- Outdoor Install: Follow local codes—some allow direct-to-soil drainage.
- Do NOT drain into canals or waterways
- Comes with 6 feet of tubing. Sufficient to put right next to system
-
Drain line sizing:
Minimum ½” diameter
For backwash flow rates exceeding 7 GPM or drain line lengths over 20 feet, a ¾” drain line is required.
-
Soldering Precautions:
Any soldering near the drain line should be completed before connecting the drain line control fitting.
Maintain at least a 6-inch gap between the solder joint and drain control fitting when soldering.
Failure to follow this could damage internal components.
- Overflow Protection:
Installation Fittings & Connections
-
When assembling the installation fitting package (inlet & outlet):
Connect the fitting to the plumbing system first before attaching the nut, split ring, and O-ring.
Ensure that heat from soldering or solvent cement does not damage the nut, split ring, or O-ring.
Allow solder joints to cool and solvent cement to set before installing the nut, split ring, and O-ring.
Avoid getting primer or solvent cement on O-rings, split rings, bypass valve, or control valve.
Electrical Connection
Plug the system into a proper electrical outlet.
Important: Ensure all electrical connections comply with local electrical codes.
Verify that the outlet is uninterrupted.
If installing on metal pipes, attach a grounding strap as required.
Your Responsibilities as an Equipment Owner | Maintenance
To ensure your Echo Water Filtration System operates efficiently and within manufacturer specifications, the following operating conditions must be maintained by you, the equipment owner:
Water Pressure Regulator
The water entering the system must be regulated by a pressure-regulating device, compliant with code, that does not exceed 75 psi.
Power Protection
The system must be powered by a 110VAC supply that is not switched.
- Surge protection is required and should be provided by you, the equipment owner. Using an Uninterruptible Power Supply (UPS) is recommended.
Salt
The system uses either sodium or potassium salt for cleaning. Ensure the brine tank is filled with high-quality salt to maintain optimal system performance. Consult with your local water professional to determine the best salt for your area.
- Potassium Pellets vs. Salt Crystals: Which is Better for Water Softeners?
- Echo Water Softener uses 0–50% less salt than traditional softeners.
- It uses only what’s needed to hydrate salt—keeps brine tank dry between cycles (reduces bacteria build up).
- Salt Maintenance: Check and top off monthly (approx. 20 lbs/month).
ProGuard
Keep the ProGuard reservoir full to ensure maximum system efficiency. ProGuard works in tandem with the softening media to enhance water quality and cleaning power. Always check the ProGuard feeder level when filling the brine tank with salt.
- Automatically doses resin-safe cleaner.
- Cleans, protects, and disinfects internal media.
- Does not enter household plumbing.
Periodic Media Replacement
Certain media within the Echo Water Filtration system may require periodic replacement. The replacement intervals depend on your water chemistry and usage habits. For optimal water quality, consult with your local water specialist to ensure timely media replacement.
- When the softening media is exhausted, the entire media tank is replaced—but not the full system. The control head and bypass valve can be reused, and only the media tank itself needs to be swapped out.
- When? Only when the system truly reaches the end of its life. This can depend on your local water quality, especially chlorine levels, but on average the media lasts 20+ years with normal use.
- There’s no alert or automatic notification built in—we’ve chosen not to include one so that customers can learn to recognize the signs themselves and become more confident in managing their system. Here’s what to look for:
- A noticeable decline in water quality
- Dishes or laundry not coming out as clean
- Personal hygiene differences (like soap not lathering well)
- In some cases, a chlorine smell, especially if the carbon pre-filters are also exhausted
If you notice any of these signs, feel free to reach out, and we can help you determine whether it’s time for a replacement or just routine maintenance.
System Installation & Startup Guidelines
Quick Installation Overview
-
Prepare the Installation Area
Clear the designated installation space and sweep the floor to remove dust and debris.
- Assemble and set up the Brine Tank
- Connect the Bypass Valve to the Water Softener Tank.
-
Check Water Pressure
Measure the incoming water pressure, ensuring it falls between 30 - 75 psi (static).
If connected to municipal water, install a code-compliant pressure regulator to protect the system.
-
Verify Water Heater Protection
Confirm that the water heater has proper heat expansion protection in place.
-
Install the System
Follow manufacturer’s instructions and local plumbing codes to set up the system, drain, and brine tank overflow.
-
System Startup and Testing
Engage the bypass mode before introducing water flow.
Run cold water from the bathtub for approximately 5 minutes at 3 GPM to clear debris and chemical residues from the pipes.
-
While the bathtub is still running, SLOWLY open the system's inlet valve.
The initial water flow may appear dark brown or black due to system disinfectant, preservatives, and residual dust from shipping.
Allow water to run until it clears and check for any visible particles.
If resin or other softening media particles are detected, bypass the system and contact technical support.
Slowly open the outlet valve to allow water to flow through the system.
Observe Water Flow & Color
-
Enter Programming Mode & Initiate Cleaning Cycle
Start a cleaning cycle by pressing the CYCLE button for at least 5 seconds.
Manually advance the system through each cycle step by pressing the CYCLE button. Observe the system during each stage, ensuring proper operation, and then progressively advance to the next until the regeneration terminates.
-
Brine Tank Checks
Brine Tubing: Push tubing fully into shoulder of quick-connect to avoid leaks or overflow.
Float Test (Brine Tank): Lift float by hand, count to 10, check for leaks or weak connection.
Leak Controller: Optional but recommended for peace of mind.
Backlight Settings & Test Cycle: Customize as needed during install.
Final System Check
-
Once the system returns to normal operating mode, observe the bathtub water flow for any remaining disinfectant or resin traces.
Allow water to run until completely clear, then turn off the bathtub.
- Test water at any softened faucet to confirm acceptable water production from the system
Your Echo Water Softener System is now installed and ready for use! If you experience any issues, contact your local service provider for assistance.
Initial Preparation
1. Set up the Brine Tank
-
Step 1: Install the Brine Well Cap
Place the brine well cap (Item A) on top of the brine well (Item B).
-
Step 2: Remove the Brine Valve Assembly
Unscrew and remove the brine valve assembly (Item C) from the brine well by loosening the nut (Item D).
-
Step 3: Attach the Brine Well to the Brine Tank
Align and secure the brine well to the brine tank using the two-piece overflow fitting (Items E & F).
Use the lower holes on both the brine well and the tank for mounting, as shown in the diagram.
-
Step 4: Reinstall the Brine Valve Assembly
Reinsert and secure the brine valve assembly (Item C) back into the brine well.
-
Step 5: Connect the Brine Line
Insert the brine line poly tube (Item G) through the upper holes in both the brine tank and the brine well.
Push the poly tube firmly into the elbow fitting until secure.
-
2. Connect the Bypass Valve to the Water Softener Tank
Pre-installation inspection
Control Valve Operating Parameters
Pre-Installation Note
- Important: Allow the unit to reach room temperature before use if it has been exposed to freezing conditions.
The valve can withstand typical transportation and storage temperatures ranging from -20°F to 120°F for short periods.
The valve is packaged to resist damage from normal humidity, vibration, and shock.
Softener Installation Location Guidelines
-
Install the softener in a convenient, accessible location close to:
Water supply inlet (after the pressure tank)
A waste water source (utility sink, floor drain, or sewer line)
An uninterrupted power outlet
Keep the softener far enough from walls or obstacles to allow room for maintenance and servicing.
Plumbing Connections
Untreated Water Fixtures: All sillcocks and similar fixtures that require untreated water must be connected to the hard water line.
-
Bypass Valve:
Must be installed so that water remains available if the softener needs to be shut off for servicing.
Easily connects to the control valve body using hand-tightened nuts.
Install with red knobs in the upward position.
Press the ends of the bypass valve with O-rings into the valve body and hand-tighten the nuts.
See Bypass Operation (Figure 1, Page 14) for proper setup.
-
Piping Sealants:
Do not use pipe dope or similar sealants on threads.
Teflon tape is not needed on caps due to O-ring seals.
Avoid Vaseline or other non-approved lubricants on O-rings. Only silicone-based lubricants are acceptable (for black O-rings only).
Valve Orientation and Flow Direction
Arrows are molded into the control valve to indicate the direction of water flow.
Tank Placement
Ensure the cabinet or mineral tank is placed on a level, stable surface.
Before Starting Work
Shut off the incoming water supply.
Open multiple faucets to allow proper drainage and ventilation of the system before making connections.
Drain Line Setup
-
The included 3/4" drain line elbow accommodates either:
1/2" poly tubing
3/4" NPT drain line connections
The nut and poly tubing insert are designed for flexible poly tubing only.
The elbow can be rotated to direct the outlet toward the nearest drain for convenience.
Drain Line Installation – 3/8" Poly Tube
- Included Components:
The 3/8" poly tube insert is pre-shipped attached to the locking clip of the drain line elbow.
Note: The 3/8" poly tubing itself is not included.
Installation Steps:
-
Prepare the Connection:
Loosen the nut on the drain line elbow.
-
Insert the Poly Tube:
Press the 3/8" poly tube (with insert) into the elbow fitting until it is fully seated at the back of the fitting.
-
Secure the Connection:
Hand-tighten the nut to ensure a snug, leak-free fit.
Drain Routing Recommendations:
-
Preferred Drain Points:
Route the drain line into a sump pit, utility sink, or washing machine drain where possible.
-
If Direct Drain Routing is Needed:
Install a fitting with a trap into the sewer line.
Position the trap as close to a vent as possible to prevent siphoning when large volumes of wastewater pass through the sewer line.
-
Important Plumbing Guidelines:
Do NOT hard-pipe the drain line directly into a waste line — this is prohibited by most plumbing codes.
The drain line must enter the trap from above, preventing water backup if a sewer clog occurs and ensuring overflow goes into the trap, not the drain line.
-
Splash Prevention Tip:
The trap should have a short extension pipe to reduce splashing when water discharges from the drain line into the trap.
Brine Line Connection Instructions
-
Step 1: Prepare the Installation Area
Verify that the floor surface beneath the brine tank is clean, level, and smooth before final placement.
-
Step 2: Connect the Brine Line to the Control Valve
Locate the brine line poly tubing that comes with the brine tank.
Insert the tubing into the brine connection port on the control valve.
The control valve is equipped with a standard refill elbow that is designed to accept a ⅜" flexible poly tube.
⚠️ Note: Ensure the tube is pushed firmly into the brine elbow fitting until it is securely seated.
Brine Line Fitting Connections
-
Brine Tank Overflow Precaution
The brine tank overflow fitting is designed for use with a ½" inside diameter (not supplied) gravity drain line.
This connection serves as a safety measure in case the brine shut-off valve malfunctions and the tank overfills.
⚠️ Important Safety Note:
If the unit is installed in a location where water overflow could cause damage, it is strongly recommended to:
Attach a suitable length of flexible tubing to the overflow fitting.
Ensure the tubing is routed to a drain located below the level of the overflow fitting.
Installation Do’s and Don’ts
✅ Do use a separate drain line for the overflow.
❌ Do not connect the overflow tubing to the drain line on the control valve.
❌ Do not run tubing above the height of the overflow fitting at any point, as this may prevent proper drainage.
Programming the Control Valve
-
Quick-Reference Card Access
A quick-reference card is stored inside the front cover of the control valve.
-
To access it:
Gently pull the tabs on the side of the cover outward.
Then pull the cover forward to open.
-
Powering On
Plug the control valve into a 120V outlet.
⚠️ Do not plug the unit into an outlet controlled by a wall switch or pull chain, as this could inadvertently turn the unit off.
-
Initialization
After powering on, wait a few seconds for the control valve to “home” itself.
The display panel will show “TIME”, and the current time will begin flashing, indicating it’s ready for setup.
Setting the Current Time
The current time of day must be entered during initial installation.
Be sure to adjust the time accordingly when Daylight Saving Time begins or ends.
- Power Outage Note
In the event of an extended power outage, the internal non-rechargeable coin cell battery may become depleted.
-
If this happens, once power is restored:
The time of day will need to be reset.
The battery should also be replaced to ensure continued backup functionality.
Adjust Hardness, Days between Regenerations, or Time of Regeneration
-
- Hardness Setting: Actual grain + 10% buffer
-
Regen Interval:
- Default: 7 days
- Ideal: Every 4–5 days for optimal media longevity
- Force flush occurs at 7 days regardless
-
Regen Time:
- Recommend: Set for 2 AM (non-usage hours)
- Total cycle: ~2 hours
- Avoid water usage during regen to prevent exposure to untreated water
Placing the Unit into Service
Make sure inlet and outlet valves are to their closed positions.
If using optional bypass, place in bypass position.
Turn on main water supply SLOWLY.
-
Open a cold water faucet.
This will clear the lines of any debris (solder, pipe dope, etc.) that may be in the line.
Let water run at tap for a couple of minutes, or until clear.
Turn off faucet.
Manually add 4–6 gallons of water to the brine tank.
-
Press and hold the REGEN button for approximately 5 seconds until the motor starts.
Wait until display reads BACKWASH and numbers start counting down.
-
Momentarily press REGEN again.
Wait until display reads BRINE and numbers start counting down.
-
Momentarily press REGEN again.
Valve is now in the second BACKWASH position.
-
If using optional bypass:
SLOWLY turn bypass valve to DIAGNOSTIC position (see Figure 2),
OR slowly open inlet valve to allow water to slowly enter the softener.
-
When water is flowing steadily to drain without the presence of air:
Momentarily press REGEN again.
Display will read RINSE.
-
Open the outlet valve of the softener
OR if using optional bypass, place to NORMAL OPERATION MODE (see Figure 3).
-
Allow control to finish the RINSE cycle.
It will then advance to the FILL position.
The brine tank will now automatically fill with the proper volume of water for the first regeneration.
Allow the control to automatically advance to the SOFTENING position.
-
Load the brine tank with salt.
Solar Salt is recommended.
SANITIZING
Use 1/4 oz. of 5.25% household chlorine bleach for each cubic foot of resin.
Pour bleach directly into the brine well of the softener.
Press and hold the REGEN button for 5–6 seconds until the motor starts running.
Allow system to complete the regeneration automatically.
Check for other local and state codes which may also specify sanitation methods.
Bypass Valve
The bypass valve is typically used to isolate the control valve from the plumbing system’s water pressure in order to perform control valve repairs or maintenance.
The WS1 bypass valve is particularly unique in the water treatment industry due to its versatility and state-of-the-art design features.
The 1” full flow bypass valve incorporates four positions, including a diagnostic position that allows service personnel to work on a pressurized system while still providing untreated bypass water to the facility or residence.
Its completely non-metallic, all-plastic design allows for easy access and serviceability without the need for tools.
CONSTRUCTION FEATURES
The bypass body and rotors are glass-filled Noryl® (or equivalent), and the nuts and caps are glass-filled polypropylene.
All seals are self-lubricating EPDM to help prevent valve seizing after long periods of non-use.
Internal O-rings can easily be replaced if service is required.
DESIGN AND OPERATION
The bypass consists of two interchangeable plug valves that are operated independently by red arrow-shaped handles.
The handles identify the flow direction of the water.
The plug valves enable the bypass valve to operate in four positions:
➊ Normal Operation Position
The inlet and outlet handles point in the direction of flow indicated by the engraved arrows on the control valve.
Water flows through the control valve during normal operation, and this position also allows the control valve to isolate the media bed during the regeneration cycle.
(See Figure 3)
➋ Bypass Position
The inlet and outlet handles point to the center of the bypass.
The control valve is isolated from the water pressure contained in the plumbing system.
Untreated water is supplied to the plumbing system.
(See Figure 1)
➌ Diagnostic Position
The inlet handle points in the direction of flow, and the outlet handle points to the center of the bypass valve.
System water pressure is allowed to the control valve and the plumbing system, while not allowing water to exit from the control valve to the plumbing.
(See Figure 2)
➍ Shut-Off Position
The inlet handle points to the center of the bypass valve, and the outlet handle points in the direction of flow.
The water is shut off to the plumbing system.
If water is available on the outlet side of the softener, it is an indication of water bypass around the system (i.e., a plumbing connection somewhere in the building bypasses the system).
(See Figure 4)
Water Meter
- The water meter is installed on the outlet side of the control valve.
- It uses a turbine to measure the gallons of treated water.
- The turbine rotates with water flow and reports its rate of rotation through Hall effect, allowing the PCB (printed circuit board) to record the total treated water volume and flow rate.
- A centrally located magnet is shielded from water, significantly reducing iron fouling problems with the turbine.
Operating Specifications
- Pressures: Min. 20 psi, Max. 125 psi
- Temperatures: Min. 34°F, Max. 150°F
- Accuracy: ± 5% over a wide operating flow rate range (0.50 gpm – 20.0 gpm up to control valve maximums)
Low pressure drop
Metering Considerations
- Water used for regeneration is not metered.
- If the control valve is set to pre-fill the regenerant, water used between the pre-fill cycle and the start of the regeneration cycle is metered.
- If the control valve is in regeneration mode (e.g., backwash cycle) and there is water demand, that water usage is not metered.
Installation Notes
- The water meter is positioned on the left-hand side of the control valve when facing the front.
- Ensure sufficient clearance for cleaning and repair without disconnecting plumbing or disassembling other valve components.
- Control valves can be ordered with a meter plug (i.e., no electronics or turbine) instead of a water meter if desired.
Valves without meters should only be set up for time clock operation (i.e., no water meter, no demand-initiated regeneration).
Valves with meters provide a broader range of useful information.
Maintenance and Handling
- Do not lubricate the turbine shaft; the turbine shaft bearings are pre-lubricated.
- Do not use Vaseline, oils, or other unacceptable lubricants on the O-ring.
- A silicone lubricant may be used on the black O-ring.
- Snap the turbine onto the shaft and reinsert the water meter into the side slot.
- Hand-tighten the nut—do not use a pipe wrench to tighten.
Cleaning and Disinfection
Your Echo Water Filtration System is likely one of the hardest working appliances in your home. Over its service life, it will process millions of gallons of water, protecting you from harmful inorganic contaminants like calcium, magnesium, lead, copper, zinc, iron, manganese, and more.
In addition to filtering out inorganic contaminants, your softener also accumulates sediment, bacteria, algae, mold, and fungus, which can enter the system through city water, salt, or even from the air. These contaminants build up in your softener over time, and can even create a biofilm of Heterotrophic Plate Count (HPC) bacteria. While these bacteria are typically harmless, they can create a food source and refuge for potentially harmful pathogens, which can negatively impact the performance and longevity of your system.
While regular antibacterial rinses and supplementation with ProGuard help minimize bacterial growth, it is important to clean and disinfect your system regularly to ensure optimal performance and protect your family's safety.
Recommended Cleaning & Disinfection Schedule
The chart below outlines the recommended monthly cleaning intervals based on the number of people in your home and the water hardness (grains per gallon):
Your local dealer can assist with cleaning and disinfection services, or you can purchase a comprehensive cleaning and disinfection kit to perform the task yourself.
System Control & Operation
Your Echo Water Filtration system incorporates an advanced microprocessor control system, making it highly efficient and reliable. All system settings are pre-programmed at the factory and then carefully calibrated by your qualified installer to meet the specific requirements of your area.
- The system features flash EEPROM memory and an innovative power backup system, ensuring that your programming remains intact even during extended power outages. Additionally, your system can be upgraded with the latest software and hardware revisions as they become available. Contact your local authorized dealer for more details.
Normal Operating Mode
In Normal Operating Mode, the display shows the time of day, remaining capacity, and system status. Your system continuously monitors the flow meter, making decisions on when and how to clean based on its programming profile and your water usage patterns.
Flow Meter
In Service Mode, the display will show the time of day and remaining capacity, with the remaining capacity counting down in gallons as water is used. You can verify the flow meter’s functionality by opening a faucet downstream of the system and observing the gallons count down along with the flow indicator.
Power-Failure Handling
If there is a power failure, the system’s integrated Snapshot memory will retain all programmed data indefinitely. The system will maintain the correct time of day for several hours. If the power is out for an extended period, the time of day may be lost, and the time display will begin flashing when power is restored. This indicates that the time needs to be reset, but all other programming will remain unaffected.
Critical Software/Hardware Failure
In the event of a critical software or hardware failure, the Error Information icon may appear as a solid or blinking light. Please contact your local service provider for assistance.
Cleaning/Regeneration Mode
Cycle times will vary depending on your water usage habits, the system operational history,
pre-programmed settings, and other environmental factors. In Regeneration Mode the display shows the current cleaning cycle description and the remaining time for that cycle to
execute. The cleaning sequence is as follows:
Tank Fill
Your system calculates the exact amount of brine solution required to properly clean itself based on pre-programmed settings, operational history, your water usage habits, and the age of the system. Your system is online and in service at this time.
Percolation
Your system remains online and in service while the water and salt slowly mix together to create a perfectly saturated sodium or potassium brine solution.
Brine Draw
Your system will extract brine water from the brine tank and apply it to the ion exchange media in the tank. This begins the ion exchange process where trapped hardness and other contaminants are forced off of the ion exchange resin beads.
Slow Rinse
Once the brine supply is exhausted, your system will begin slowly rinsing contaminants through the media bed and out of the tank to drain.
Backwash
Your system rapidly discharges water upwards through the media to the drain. This ensures that trapped sediment & broken media are flushed out of the tank to minimize pressure loss & channeling.
Rapid Rinse
A high velocity stream of water is directed downwards through the multimedia bed to compact each of the media layers, flush hard water from the tank, and prepare for returning itself to service.
Return to Service
The system slowly drives the operating piston to the home position and gracefully brings itself back online, ready to work hard for you.
Your system will automatically perform an antibacterial deep cleaning at regular intervals, recommended at least once a week.
- During this cycle, ProGuard will be injected into the system, and depending on your water usage, salt may also be used for cleaning.
- If no water has been used during that interval, the system will complete the antibacterial cleaning cycle without consuming any salt.
ProGuard
The ProGuard™ feeder integrated into every Echo Water Softener system ensures optimal water quality year-round. This simple dispensing system is specially designed to work in all climates, easily introducing ProGuard into your brine tank while the system is preparing for its cleaning cycle.
Your Echo Water Softener system will adjust its ProGuard usage based on your water consumption habits, always aiming to maximize efficiency and performance, providing you with the water quality you deserve.
ProGuard is designed to:
- Clean ion-exchange resin without damaging the structured matrix media
- Clean all moving parts and create a temporary protective coating
- Create an inhospitable environment for bacteria within the system
- Remove oils and other hydrocarbons from resin
- Clean Activated Carbon Media
- Enhance self-sanitization processes on compatible systems
Always ensure your ProGuard reservoir is full to maintain proper system performance, longevity, and efficiency.
Servicing Instructions
If your Echo Water Softener system requires service, please reference our Echo Water Softener Service Instructions
System Troubleshooting Guidelines
Note: These troubleshooting guidelines are not all-inclusive and do not replace the expert diagnosis of your Certified Water Professional.
Hard (Untreated) Water to Service
| Cause | Solution |
|---|---|
| Open or defective bypass | Close or verify bypass |
| Loss of media | Refer to problem “Loss of media” |
| Unit fails to regenerate | Refer to problem “System fails to clean” |
| Valve fails to draw brine | Refer to problem “System fails to draw brine” |
| Decreasing exchange capacity of resin | Clean or replace resin bed |
| No salt in brine tank | Add salt |
| Leak at riser tube | Verify riser tube is seated correctly and undamaged |
| ProGuard supply exhausted | Refill ProGuard feeder |
System Fails to Regenerate
| Cause | Solution |
|---|---|
| Faulty electrical supply | Verify electrical service; confirm unswitched outlet |
| Obstructed flow meter | Clean and/or replace flow meter |
| Damaged PCB | Replace PCB |
| Damaged drive motor | Replace drive motor |
Loss of Water Pressure / System Runs Continually Down the Drain / Loss of Media Through Drain Line
| Cause | Solution |
|---|---|
| Mineral or iron build-up in resin tank | Clean resin bed & control valve; increase regen frequency & ProGuard |
| Plugged lower and/or upper distributor | Verify distributors are free of debris |
| Crushed lower and/or upper distributor | Replace distributor(s); check for temperature/pressure protection |
| Resin damaged due to attrition or chemicals | Replace resin |
System Fails to Draw Brine (Not Using Any Salt)
| Cause | Solution |
|---|---|
| Low operating pressure | Verify pressure exceeds 30 psi dynamic |
| Plugged injector | Clean injector |
| Plugged injector filter | Clean injector filter |
| Piston stuck in incorrect position | Inspect drivetrain and perform remedial action |
| Restricted/obstructed drain line | Check for kinks or obstructions |
| Restricted/obstructed brine line | Check for kinks or obstructions |
| Leak in brine line | Verify all connections for air leaks |
| Insufficient water in brine tank | Refer to “System fails to refill brine tank” |
Excessive Water in Brine Tank
| Cause | Solution |
|---|---|
| System fails to draw brine | Refer to “System fails to draw brine” |
| Improper brine refill time setting | Verify refill time matches salt level and media |
| Missing brine refill flow control | Verify flow control is installed and sized correctly |
| Leak from valve to brine tank | Clean or replace brine valve |
| Brine valve damaged | Replace brine valve |
System Uses Too Much Salt
| Cause | Solution |
|---|---|
| Excessive water in brine tank | Refer to “Excessive water in brine tank” |
| System cleaning frequently | Check for excess water use: leaky toilets, RO systems, humidifiers, etc. |
Salty Water to Service
| Cause | Solution |
|---|---|
| Excessive water in brine tank | Refer to “Excessive water in brine tank” |
| Injector undersized | Verify injector selection |
| Injector fouled | Remove and clean injector |
| Improper brine/slow rinse time setting | Verify time matches salt level and resin/media |
| Improper fast rinse time setting | Verify time matches salt level and resin/media |
System Fails to Refill Brine Tank
| Cause | Solution |
|---|---|
| Improper brine refill time setting | Verify refill time matches salt level and amount of resin |
| Plugged refill flow control | Clean flow control |
Troubleshooting Procedures
1. Timer Does Not Display Time of Day
| Possible Cause | Solution |
|---|---|
| a. Transformer unplugged | a. Connect power |
| b. No electric power at outlet | b. Repair outlet or use working outlet |
| c. Defective transformer | c. Replace transformer |
| d. Defective PC board | d. Replace PC board |
2. Timer Does Not Display Correct Time of Day
| Possible Cause | Solution |
|---|---|
| a. Switched outlet | a. Use uninterrupted outlet |
| b. Power outage | b. Reset time of day |
| c. Defective PC board | c. Replace PC board |
3. No Softening/Filtering Display When Water is Flowing
| Possible Cause | Solution |
|---|---|
| a. Bypass valve in bypass position | a. Put bypass valve in service position |
| b. Meter connection disconnected | b. Connect meter to PC board |
| c. Restricted/stalled meter turbine | c. Remove meter and check for rotation or foreign material |
| d. Defective meter | d. Replace meter |
| e. Defective PC board | e. Replace PC board |
4. Control Valve Regenerates at Wrong Time of Day
| Possible Cause | Solution |
|---|---|
| a. Power outages | a. Reset control valve to correct time of day |
| b. Time of day not set correctly | b. Reset to correct time of day |
| c. Time of regeneration incorrect | c. Reset regeneration time |
| d. Control valve set at "on 0" (immediate regeneration) | d. Check set-up procedure regeneration time option |
| e. Control valve set at NORMAL + 0 | e. Check set-up procedure regeneration time option |
5. ERROR Followed by Code Number
Error Codes:
101: Unable to recognize start of regeneration
102: Unexpected stall
103: Motor ran too long; timed out trying to reach next cycle
104: Motor ran too long; timed out trying to reach home position
If other codes display, contact the factory.
| Possible Cause | Solution |
|---|---|
| a. Control valve has just been serviced | a. Press NEXT + REGEN for 3 seconds, or unplug/replug power |
| b. Foreign matter in valve | b. Check piston and spacer stack for debris |
| c. High drive forces on piston | c. Replace piston(s) and spacer stack |
| d. Piston not in home position | d. Press NEXT + REGEN or unplug/replug power |
| e. Motor not fully inserted / wires broken | e. Check motor and wiring; replace motor if necessary |
| f. Drive gear label dirty, damaged, or missing | f. Replace or clean drive gear |
| g. Drive bracket misaligned | g. Reset drive bracket properly |
| h. PC board damaged or defective | h. Replace PC board |
| i. PC board incorrectly mounted | i. Ensure PC board is properly snapped into drive bracket |
6. Control Valve Stalled in Regeneration
| Possible Cause | Solution |
|---|---|
| a. Motor not operating | a. Replace motor |
| b. No electric power at outlet | b. Repair outlet or use working outlet |
| c. Defective transformer | c. Replace transformer |
| d. Defective PC board | d. Replace PC board |
| e. Broken drive gear or drive cap | e. Replace drive gear or drive cap assembly |
| f. Broken piston retainer | f. Replace drive cap assembly |
| g. Broken main or regenerant piston | g. Replace main or regenerant piston |
7. Control Valve Does Not Regenerate Automatically (but works with REGEN button)
| Possible Cause | Solution |
|---|---|
| a. Transformer unplugged | a. Connect transformer |
| b. No electric power at outlet | b. Repair outlet or use working outlet |
| c. Broken drive gear or drive cap | c. Replace drive gear or drive cap assembly |
| d. Defective PC board | d. Replace PC board |
8. Control Valve Does Not Regenerate Automatically, But Does When REGEN is Pressed
| Possible Cause | Solution |
|---|---|
| a. Bypass valve in bypass position | a. Put control valve in service position |
| b. Meter connection disconnected | b. Connect meter to PC board |
| c. Restricted/stalled meter turbine | c. Remove meter and check for rotation/debris |
| d. Defective meter | d. Replace meter |
| e. Defective PC board | e. Replace PC board |
| f. Set-up error | f. Check control valve set-up procedure |
9. Time of Day Flashes On and Off
| Possible Cause | Solution |
|---|---|
| a. Power outage over 2 hours, transformer replugged, or system reset manually | a. Reset time of day |
Need Help? Contact Support
If you encounter any issues or have questions about your Echo Water Softener, our dedicated support team is here to assist you. Whether you're experiencing technical difficulties, need replacement parts, or just have a general inquiry, don't hesitate to reach out.
Email Support
Send a detailed description of your issue to: techsupport@echowater.com
Please include:
Your Order Number
Photos (if applicable) to help us better understand the issue
Our team will respond promptly to assist you.
Phone Support
Call Tech Support at: +1 (855) 737-1114
Available: Monday–Friday (Closed weekends & major US Holidays)
Hours: 9:00 AM – 5:00 PM (MST)
Book Installation Assistance
You can use the link above to schedule installation assistance with our tech support team, who will guide your plumber through the setup process.
Online Support:
Visit our website at www.echowater.com/support to access FAQs, and troubleshooting guides, and to submit a support request directly. We also offer chat support between 9 AM and 5 PM MST, Monday through Friday.
We are committed to ensuring you have the best experience with your new Echo Water Softener. Your satisfaction is our top priority!
Add comment
Please sign in to leave a comment.